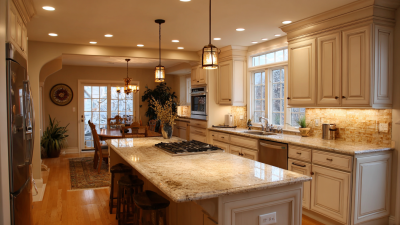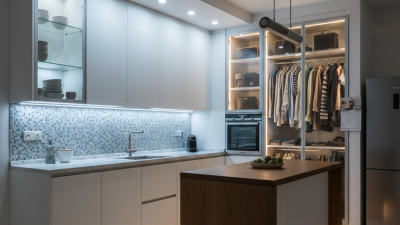
Choosing the right Led Kitchen Lights means balancing clear task lighting with warmth, comfort, and visual calm. Recessed downlights spread general light across the room, while under-cabinet strips brighten countertops without casting your hands’ shadows onto a cutting board. Pendant lights can define an island, especially when their shades hang low enough to illuminate the surface but not block conversation. Small details matter. A narrow beam can leave a dark patch beside the sink, and a glossy backsplash may reflect exposed bulbs.
This guide compares recessed, under-cabinet, pendant, flush-mount, track, and toe-kick options, with practical notes on placement, brightness, and color temperature. For transparency, the named specialist below is fictional, and the quotation is an editorially created line—not a sourced expert statement. Fictional lighting specialist Maya Chen puts the central idea this way: “Good kitchen lighting follows the work, then makes the room feel welcoming.” That is a useful starting point, not a complete specification. Room size, ceiling height, cabinet finish, and existing wiring can change what works. A layered plan often helps, but more fixtures do not automatically mean better light. Too many bright points can feel harsh at night. The best choice is the one that makes the chopping board clear, the counters comfortable, and the kitchen pleasant after dinner.
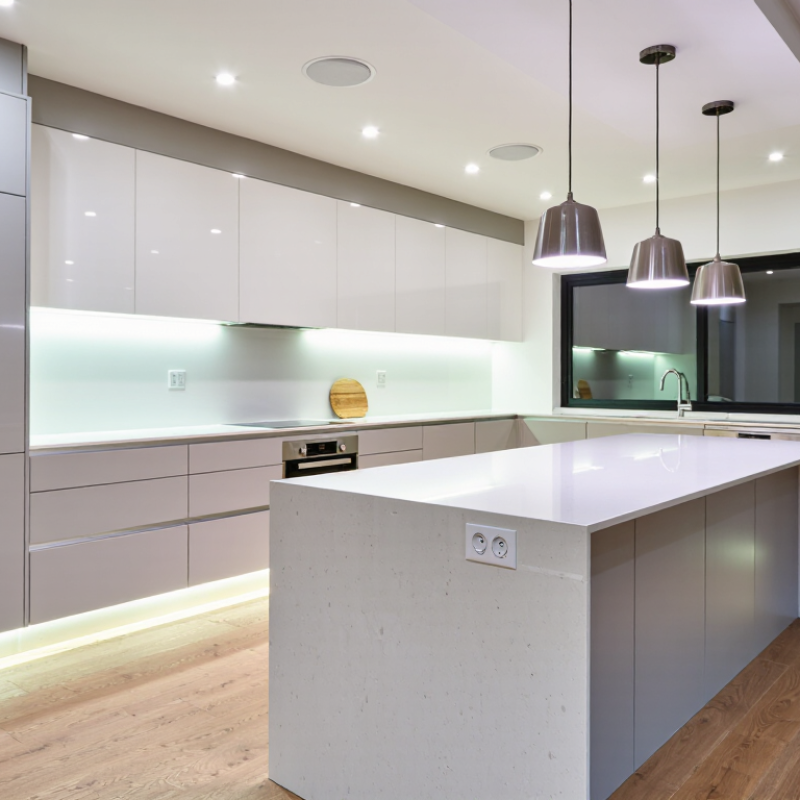
Recessed LED downlights producing 800–1,200 lumens each can provide a practical base layer for general kitchen lighting. Their broad, even spread helps illuminate counters, walkways, and the floor. But lumens alone do not guarantee a bright room. Ceiling height, fixture spacing, beam angle, and darker finishes all affect how light reaches a surface. A row of evenly spaced lights may still leave shadows over a deep countertop. That can be frustrating.
The U.S. Department of Energy’s Energy Saver guidance says LEDs use at least 75% less energy than incandescent lighting. It also notes that LEDs can last up to 25 times longer. Those figures support LEDs as an efficient choice, but they do not determine the right number of downlights. For a reliable plan, check the fixture’s delivered lumens and beam spread, then assess the actual room. A lumen target is a starting point, not a promise.
Tips: Sketch the ceiling and mark cabinets, sinks, and work zones before choosing spacing. Use dimmers where compatible. Try the lighting at night, when daylight cannot hide dark patches. If the counters still look gloomy, add focused task lighting rather than simply increasing every downlight’s output.
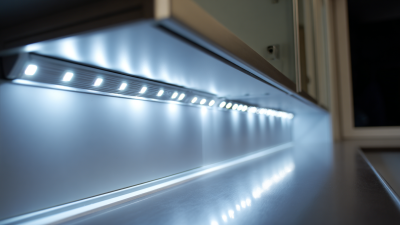
Among the top types of LED kitchen lights, under-cabinet fixtures provide the most practical task lighting. They place light directly over countertops, reducing shadows from wall cabinets and your body. A useful working range is 300–1,000 lumens per meter. Choose the lower end for decorative preparation areas. Use the higher end for chopping, baking, or dark stone surfaces.
The Illuminating Engineering Society recommends designing kitchen tasks around adequate horizontal illuminance, not brightness alone. In practice, I look for even coverage, a high color-rendering index, and minimal glare. A 400–500 lumen-per-meter strip often feels balanced beneath standard cabinets. Wider counters may need two runs or carefully spaced light sources. Too much output can create reflected glare.
Color temperature matters too. Around 3,000–4,000 K usually keeps food colors believable without making the kitchen feel cold. The U.S. Department of Energy’s Solid-State Lighting reports show that modern LED systems deliver far higher efficacy than older lighting technologies, helping reduce energy use during daily cooking. Still, lumen ratings can mislead. Diffusers, cabinet depth, and mounting height can cut useful light. I once tested a bright strip mounted too far back; the countertop remained unevenly lit. Measure the work surface, not just the fixture.
What Are the Top Types of LED Kitchen Lights?
LED pendant lights work especially well above kitchen islands and dining tables. A useful target is 800–1,500 lumens per pendant, depending on room size, ceiling height, and the fixture’s shade. Larger islands may need two or three pendants, but the total brightness matters more than the number of fixtures. For example, three 900-lumen pendants provide 2,700 lumens before shade loss. Opaque glass can reduce the light reaching the countertop. That detail is easy to overlook.
Placement affects comfort as much as brightness. Hang pendants about 30–36 inches above the island surface, then adjust for sightlines and household habits. A dimmer helps the same light support chopping, homework, and relaxed dinners. Choose a color temperature near 2700–3000K for a warm dining atmosphere, or around 3500K for clearer task lighting. A high color-rendering rating, preferably 90 or above, helps vegetables and wood surfaces look more natural. Avoid exposed, intense LED points when possible. They can create glare while people sit across from each other.
I have found that lumen calculations rarely feel perfect on paper. Dark cabinets, high ceilings, and textured shades change the result. Measure the island, inspect the shade opening, and test the light at night before final installation. I still underestimate glare sometimes. That is why adjustable brightness remains valuable. Ensure the fixture and wiring meet local electrical requirements, and use a qualified electrician when installation involves existing circuits.
LED track lights can deliver 500–1,000 lumens per head for adjustable accent lighting. This range works well above kitchen islands, dining corners, and open shelving. Each head can turn toward a cutting board, artwork, or a dark countertop section. Aim carefully.
In my experience, three or four heads often provide more useful coverage than one powerful ceiling fixture. A narrow beam highlights a specific feature, while a wider beam spreads light across cabinets and work surfaces. Choose a high color rendering index when food preparation matters. Colors look more natural, especially with fresh vegetables and meat. A warm white tone can make wood surfaces inviting, but cooler light may improve task visibility.
Track placement still needs practical testing. A rail installed too close to the wall can create harsh cabinet shadows. Mounted too far forward, it may shine directly into someone’s eyes. Dimmable fittings offer better control during breakfast, cooking, and evening entertaining. Check compatibility between the driver, dimmer, and household wiring before installation. I once underestimated reflected glare from a glossy backsplash, and the light became uncomfortable after dark. That mistake showed me that lumen output alone does not determine comfort. Adjustable heads help, but they cannot fix poor positioning. Ceiling height, beam angle, surface color, and daily habits all influence the final result.
| LED Track Light Feature | Typical Specification | Kitchen Lighting Benefit | Recommended Use | Selection Considerations |
|---|---|---|---|---|
| Light Output per Head | 500–1,000 lumens | Provides focused accent lighting while adding useful supplemental illumination. | Highlighting countertops, islands, open shelving, artwork, and architectural details. | Choose higher output for taller ceilings, darker finishes, or greater distance from the target surface. |
| Adjustability | Rotating or pivoting heads, commonly adjustable through approximately 90° or more | Allows the beam to be aimed at changing kitchen layouts and specific work or display areas. | Flexible accent lighting over islands, dining corners, sinks, and wall cabinets. | Confirm that each head can be aimed independently without being blocked by adjacent fixtures. |
| Beam Angle | Approximately 15°–40° | Narrow beams create emphasis; wider beams spread light across larger surfaces. | 15°–25° for artwork and displays; 30°–40° for counters and shelves. | Use the beam angle, mounting height, and target distance together to avoid bright spots and dark gaps. |
| Color Temperature | 2,700–3,000 K for warm white; 3,500–4,000 K for neutral white | Warm white creates a comfortable atmosphere, while neutral white gives food and work surfaces a cleaner appearance. | 2,700–3,000 K for traditional or cozy kitchens; 3,500–4,000 K for contemporary task and accent lighting. | Keep the track lights visually consistent with nearby ceiling, under-cabinet, and pendant lights. |
| Color Rendering Index | CRI 80 minimum; CRI 90 or higher is preferred for kitchens | Higher color rendering helps reveal the natural colors of ingredients, finishes, and decorative objects. | Food preparation zones, dining areas, stone surfaces, wood cabinetry, and display shelving. | Look for a published CRI rating rather than relying only on the fixture’s color-temperature label. |
| Power Consumption | Typically about 6–15 watts per head for 500–1,000 lumens | LED technology can deliver focused light with relatively low electrical consumption. | Residential kitchens requiring flexible accent lighting without installing many separate fixtures. | Actual wattage depends on LED efficiency, optics, heat management, and the selected light output. |
| Track Configuration | Single-circuit, two-circuit, flexible, or monorail-style systems | Different configurations support fixed layouts, grouped switching, or more adaptable positioning. | Single-circuit tracks for simple installations; multi-circuit systems for separate accent and task-lighting control. | Verify track compatibility, circuit requirements, connector types, and available mounting accessories. |
| Dimming Capability | Commonly dimmable when paired with a compatible LED dimmer | Lets users reduce brightness for dining or increase it for food preparation and cleaning. | Kitchens that serve multiple functions throughout the day. | Check compatibility among the fixture, driver, dimmer, and electrical system to minimize flicker or buzzing. |
| Mounting Height | Often installed on ceilings or suspended from ceilings; target height varies by kitchen design | Proper placement improves coverage and keeps the adjustable heads from creating unwanted glare. | Ceiling-mounted tracks over islands, peninsulas, circulation paths, and display walls. | Aim light toward surfaces rather than directly into eye level, and maintain suitable clearance from cabinets and doors. |
| Best Lighting Role | Accent and supplemental task lighting | Adds visual focus and directional illumination but does not always replace uniform general lighting. | Pair with ambient ceiling lighting and under-cabinet lights for balanced kitchen illumination. | Use layered lighting to reduce shadows on work surfaces and prevent over-lighting a single area. |
Among the top types of LED kitchen lights, ceiling panels provide broad, even illumination across work surfaces. Many efficient panels deliver 90–120 lumens per watt under suitable operating conditions. This range can reduce energy use without creating harsh shadows above counters or islands. Light distribution matters. A 600-by-600-millimeter panel can spread soft light across a compact kitchen, while larger rooms may require several units. Spacing should follow the manufacturer’s beam pattern and ceiling height.
In practical installations, panel performance depends on more than lumen output. A panel with a high color rendering index can show vegetables, sauces, and wood finishes more accurately. A color temperature near 3500–4000 Kelvin often feels suitable for food preparation. Lower temperatures may appear warmer, but they can make white worktops look yellow. Check for low flicker, especially near glossy counters and stainless-steel appliances. Reflections reveal weaknesses quickly.
The 90–120 lumens-per-watt figure is not always the result in a finished kitchen. Heat, dust, dimming equipment, and aging can reduce useful output. Measure the room. Dark cabinets may absorb light and require closer panel spacing. Installation errors also matter; an off-center panel can leave one cutting area noticeably dim. I have found that brightness alone does not guarantee comfort. Some very bright panels still feel tiring when their diffuser is poor or their color shifts over time. Verify test data, warranty terms, and electrical compatibility before installation.